Low Back Pain: Charlie Samos
Low Back Pain: Charlie Samos
I love Charlie, and his class has always been one of my favorites in Los Angeles. A veteran teacher, teacher trainer, and avid outdoorsman, Charlie has a sharp eye for alignment. In this week’s guest post, he breaks down four fundamental poses to reveal their therapeutic application for low back pain.
—–
When trying to recover from an injury, the fundamentals will serve you well. Go back to the basics, in order to solve what may or may not be complicated.
These relatively basic poses, done correctly, can often have a dramatic effect on low back pain and sciatica issues. The key is to do them correctly and consistently.

- If there are no knee issues, or ankle issues, allow the hips to move back and let the sit bones sink towards the heels. Choose to have the knees hip width apart, not too wide and splayed apart, and not too narrow, legs touching each other.
- Keeping the hips back, fully extend the arms forward. Notice if the head is dipped towards the ground, and causing the upper mid back, (thoracic spine), to round.
- If so, (highly likely for many), place a prop, block, blanket, under the forehead. Continue to extend the arms forward. Separate the hands at least shoulder width, possibly wider if the thoracic is still rounding.
- Spread the fingers out, and root the circumference of the palm down.
- Squeeze the elbows straight, lifting the forearms off the floor, but keeping the entire palm on the floor.
- Keep the arms fully extended, but keep the hips back, and the sit bones moving towards the heels. Hold for 10 breaths.
KNEE/ANKLE ISSUES IN CHILD’S POSE
If the ankles bother the practitioner, you’ll need to roll up a towel, and place it between the floor and the ankle, supporting the ankle.
If the knees are an issue, you must assess the issue. The front of the knee, the kneecap side, can be padded with a blanket if that is sensitive.
If the backside, or sides of the knee bother the practitioner, it is more complicated, and sometimes can not be fixed, and the pose must be flipped upside down and turned into Apanasana. First try placing a rolled up towel behind the knee, and then move into Child”s Pose. If that does not work, you can increase the size to a blanket. If still no success, move to Apanasana.
DOWNWARD FACING DOG (WIDE VERSION)
Starting in extended Child’s Pose with the arms fully forward, curl the toes under and come into Downward Dog. Do not shorten Downward Dog. The distance between hands and feet should be the same size as a Plank Pose, or Extended Child’s Pose.
Start out with your knees bent and your heels lifted. The classic pose is hands shoulder width, and feet hip width. For low back issues, widen the hands and feet slightly.
- Open the palms and instead of having the fingers point straight ahead at 0 degrees, turn the hands out about 45 degrees. (90 degrees would make the fingers point to the side and the thumbs point forward, be in the middle at 45 degrees.)
- Press the circumference of the palm into the mat evenly, and extend and open the finger, placing the finger pads down evenly. Press the hand down while squeezing the elbows straight.
- As the arms fully extend, turn the outer upper arm, the tricep towards the back of the mat. The action of straightening the arms will keep the inner hand down as well as move the hips up and back.
- Now begin to move the chest back towards the legs, but keep the hand down evenly, and the outer upper arm turned back.
- Separate the feet mat width apart on a standard sized mat (outer edge of the foot lining up with the outer edge of the mat, knees still bent, heels still lifted).
- Keeping the heels lifted, press the front of the leg into the back of leg, straightening the legs. The upper body does not change as you work the legs. If the chest moves forward or the lower back begins to round, or the arms begin to bend, return to bent legs — just try to lessen the bend while maintaining the length from fingertips to hips.
- If the torso is maintained and the legs are straight, finally begin to lower the heels towards the mat, but notice if the low back rounds or the chest moves forward, instead of towards the legs.
- The heels do not need to touch the floor, they simply release as close to the mat as possible. Remember, fingertips to hips must be maintained, before moving into the legs. Better to have a long spine, with lifted hips, and bent knees, than having a rounded spine, with low hips and straight legs. Go for the length in the spine first, then the legs.
- Return to Child’s Pose and repeat 2 to 6 times.

- Lying onto your back, bend the knees and place the feet flat. Have your feet hip width apart and parallel.
- Your inner heels will line up with your sit bones. Keeping your pelvis on the floor, move your gluteus muscles towards the heels, extending your tailbone towards the heels.
- Begin to lift the hips up, and continue to move the gluteus muscles and tailbone towards the back of knees.
- Keep the inner thighs turning towards the mat, so that the legs do not splay apart–the legs stay hip width apart.
- Begin to move the shoulder blades away from the mat and into the body. Take the inside of the shoulder blade closest to the spine in and up into the body as if you are trying to lift your lungs with your shoulder blades towards the chest.
You can either interlace the hands, or hold the outer edge of the mat with the hands. - Either way, turn the outer upper arm, the tricep into the mat, helping keep the lift in the shoulder blades. Rest and repeat 3 to 5 times.

- Lie onto your back, as if you where going to do Bridge– knees bent and your feet on the floor hip width apart.
- Place a yoga belt onto the right foot, where the front of the heel meet the back of the arch of the foot. Extend your right leg up to the ceiling. The leg is completely straight, no bend at all in the knee.
- Have the foot be above the hip, not towards the shoulders. If above the hip is not possible without bending the knee, then choose to have a straight leg, letting the foot move forward of the hip. The key is to have a straight leg.
- Leave your left leg bent, foot on the floor.
- Keep the hips even. Notice if the right hip is moving up towards the right shoulder, instead, move the outer hip away from the shoulder, keeping the sides of the waist the same length. Press the front of the leg into the back of the leg. Extend the ball of the foot towards the ceiling.
- Reach the inner calf muscle to the inner ankle. Think of putting an energetic footprint onto the ceiling.
- Maintaining the right leg, you can now consider straightening the left leg forward, resting the heel onto the mat. Press the inner left thigh to the mat. Extend the entire inseam of the leg into the inner heel. Open both soles of the feet, inner foot towards outer foot. Hold for a minimum of a minute, but up to 4-5 minutes. Then switch sides.
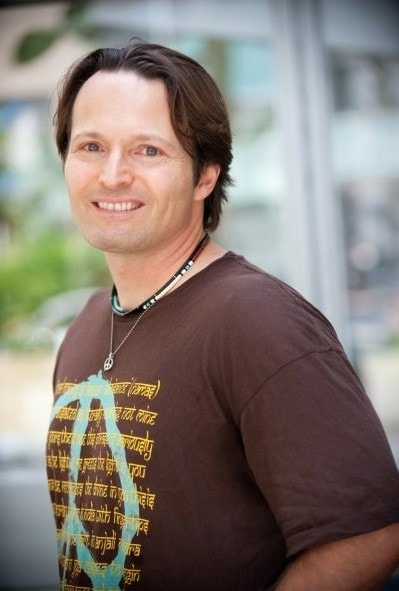 After years of competitive sports and physical training, Charlie took his first yoga class in 1995 hoping to increase his flexibility and balance. What he found was both a passion and a practice, where he could create strength and experience physical and psychospiritual openness in a serene, non-competitive environment. For over a decade, Charlie practiced and studied variously under Maty Ezraty, Lisa Walford, Heather Duplex, Malachi Melville and Julie Kleinman.
He began teaching in 2005, emphasizing (though not limited to) Ashtange and Iyengar methods. His teaching style focuses on mindfulness and presence, attention to breath, alignment and movement/flow, all leading to stillness.
As his many students will attest, Charlie has a natural talent to create a peaceful environment where ego release, mental calmness and emotional openness lead to self-acceptance and growth. When Charlie is not in the yoga studio, you’ll find him rock climbing, hiking and mountain unicycling.
Website: charliesamos.com
Instagram: charliesamosyoga
Facebook: facebook.com/charliesamos
Catherine Tingey
Entrepreneur, yogini, designer, award-winning filmmaker, personal trainer and former marathon runner. She left a career in finance to start her own business and along the way, became a yoga teacher. She has been practicing yoga for 33 years and teaching privately for 13 years.
About the Author
Catherine Tingey+ Entrepreneur, yogini, designer, award-winning filmmaker, personal trainer and former marathon runner. She left a career in finance to start her own business and along the way, became a yoga teacher. She has been practicing yoga for 33 years and teaching privately for 13 years.
Related Posts

All About The Psoas Part 3 Manual Release Techniques →

Acute Low Back Pain →

My First YouTube Video! →